How to Make Wood Art with Fractals and High Voltage Electricity
Creating Lichtenberg fractals on wood involves applying high voltage electricity to the surface, which burns intricate, lightning-like patterns known as fractals. This technique uses a specialized high-voltage device to safely channel electricity through the wood, resulting in striking and unique designs that blend science and art.
The process requires careful preparation, including treating the wood with a conductive solution to guide the electric current. Artists and hobbyists alike use transformers from microwaves or neon signs to generate the necessary voltage, creating patterns that are impossible to replicate by hand.
Beyond its visual appeal, this method transforms ordinary wood into a dynamic piece of art that reflects natural electrical phenomena. It’s both a technical and creative challenge that draws interest for its combination of precision and unpredictability.
Understanding Lichtenberg Fractals
Lichtenberg fractals are distinct, intricate patterns formed through electrical discharge. These patterns have a scientific basis, a historical origin, and practical uses in artistic woodwork.
What Are Lichtenberg Figures
Lichtenberg figures are branching, tree-like patterns created when high voltage electricity discharges through an insulating material. The electricity follows paths of least resistance, producing fractal-like designs resembling lightning or dendrites.
They occur naturally in materials like acrylic and wood when a high-voltage current passes through. In wood, conductive agents such as saltwater are applied to help the electricity flow, burning paths into the surface. The patterns are unique each time due to the random nature of electrical discharge.
These fractals illustrate complex physical phenomena and the properties of electrical breakdown.
Historical Background
Lichtenberg figures are named after Georg Christoph Lichtenberg, an 18th-century physicist who first studied electrical discharge patterns in 1777. He discovered that electrical sparks left distinctive marks on insulating surfaces, which he documented in detail.
His work contributed to early research on electricity and surface charge distribution. Over time, these figures became a visual representation of electrical phenomena and inspired scientific curiosity as well as artistic exploration.
Recent decades have seen the adoption of this effect in art, particularly with advanced high-voltage equipment enabling controlled pattern creation on wood and other materials.
Applications in Wood Art
Artists use high-voltage electricity to create Lichtenberg figures on wood surfaces, applying conductive solutions to enable controlled fractal burns. This technique is often called fractal wood burning or Lichtenberg wood burning.
The process produces fine, lightning-like patterns that highlight the wood’s texture and grain. Woodworkers embrace this method for its ability to transform ordinary slabs into visually complex, unique pieces.
Applications include decorative tabletops, wall hangings, and other custom furniture. The combination of natural wood aesthetics and precise electric patterns brings a blend of science and creativity to each artwork.
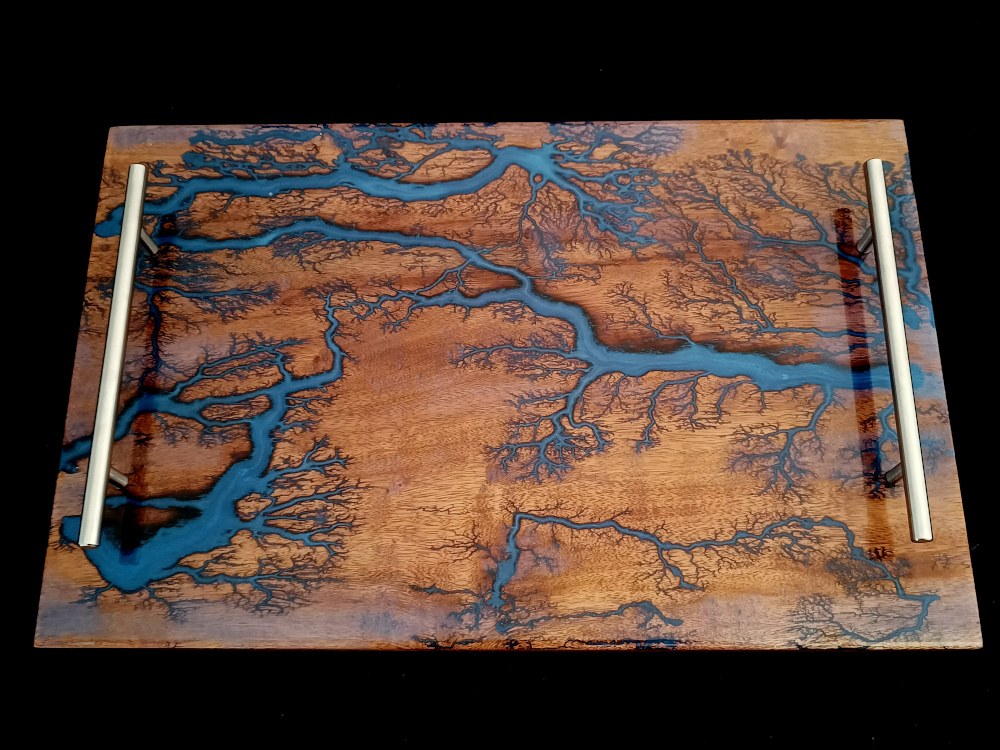
An example like the one above can be viewed and/or purchased at Etsy
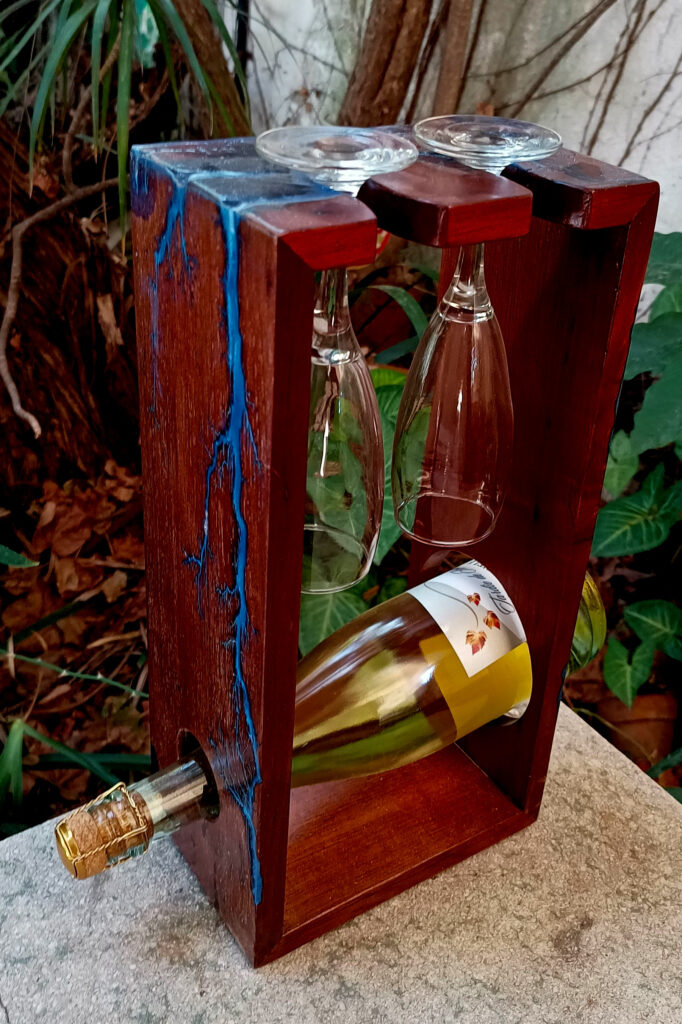
See more examples on our page
High Voltage Electricity and Safety
Using high voltage electricity to create Lichtenberg fractals involves significant risk. Proper understanding of safety protocols, protective equipment, and potential hazards is critical for anyone attempting this art.
Essential Safety Measures
High voltage wood burning typically uses voltages between 2,000 and 15,000 volts. This high voltage can cause fatal electric shock or severe injury if mishandled.
Working with a reliable power source that includes built-in safety features like circuit breakers is crucial. Never work alone; having someone nearby can provide emergency assistance.
Keep the workspace dry and free of conductive materials. Use insulated tools and maintain clear separation between live components and the body.
Ensure the wood is thoroughly soaked in a conductive solution to control the electrical path, reducing the risk of unexpected current flow.
Protective Gear and Equipment
Proper protective gear is necessary to minimize risk. This includes insulated gloves rated for high voltage, rubber-soled shoes, and safety goggles to protect against sparks.
Use insulated and grounded work surfaces to prevent accidental grounding through the body. A non-conductive mat helps isolate the artist from the floor.
High voltage transformers and probes should meet safety standards, and connections must be secure and insulated.
A well-ventilated area is recommended to avoid inhaling smoke or chemical fumes released during burning. Respiratory protection may be necessary depending on chemicals used.
Electrical Hazards
Electricity in Lichtenberg burning can arc unpredictably, causing burns or fire. Contact with live electrodes can result in severe shock or cardiac arrest.
There is also danger from faulty or improvised equipment like microwave transformers, which can fail or short circuit.
The combination of water, wood, and electricity increases conduction unpredictability. Wet wood is a conductor and can cause the current to jump unexpectedly.
Proper training and respect for high voltage electricity prevent accidents. Always de-energize and discharge equipment before adjustments to avoid residual electrical charge hazards.
Preparing Wood for Lichtenberg Art
Proper wood preparation is crucial for creating clear and detailed Lichtenberg fractals. This involves selecting the right type of wood, preparing the surface to ensure even current flow, and applying a conductive solution to guide the electrical patterns.
Choosing the Right Wood
Select hardwoods like maple, oak, or birch for better detail and durability. Softwoods such as pine or cedar may char too quickly, producing less defined patterns.
Wood should be free of knots, imperfections, and resin pockets as these disrupt electrical flow and can create uneven fractals. Dry wood with a moisture content under 12% is ideal to avoid inconsistent burning and potential safety risks.
Using a flat, smooth plank of at least 1-inch thickness helps maintain stability during the process. Avoid treated or painted wood, which can interfere with conductivity and release harmful fumes when burned.
Surface Preparation
Sanding the wood smooth is essential for consistent electrical contact. Use fine-grit sandpaper (220-grit or higher) to eliminate rough spots and open up the wood grain.
After sanding, clean the surface thoroughly by wiping it with a damp cloth to remove dust and debris that could block the conductive solution. Allow the wood to dry completely before moving forward.
Marking the design area lightly with pencil can help guide the placement of electrodes and solution. Avoid deep scratches or grooves that could cause unintended electrical paths.
Applying the Conductive Solution
A conductive solution is necessary to carry high voltage across the wood surface, enabling fractal patterns. Common mixtures include water with dissolved baking soda or salt.
Use a spray bottle or brush to apply a thin, even layer across the intended burning area. The solution should be wet enough to conduct electricity but not pooling, which can cause excessive burning or short circuits.
Reapply the solution as needed during the burning process to maintain conductivity. Avoid over-saturation to prevent dangerous arcing or damage to the wood structure.
Creating Lichtenberg Fractals on Wood
The process involves preparing electrical equipment carefully, controlling how current moves through the wood, and refining the visual result after burning. Attention to safety and precision at each step impacts the quality and safety of the final fractal wood art.
Setting Up the High Voltage Equipment
A high voltage power source is essential, commonly a neon sign transformer or a microwave oven transformer adapted for this purpose. The power supply must deliver low current to reduce risk but provide enough voltage to create branching electric patterns on the wood surface.
Two copper electrodes or high voltage wires are attached to the wood, spaced to direct the electrical discharge across the area where the fractals are desired. Applying a conductive solution like salt water to the wood surface increases conductivity and helps shape the burn pattern.
Safety gear such as insulated gloves, goggles, and a well-ventilated workspace is critical due to the danger of electrical shock and wood fumes. The equipment setup should be double-checked to prevent accidental contact with live wires.
Designing the Fractal Pattern
The pattern depends on electrode placement and wood moisture. Electrodes spaced closer create denser, smaller fractals; wider spacing yields larger, more spread-out branches. The conductive solution can be applied uniformly or selectively for varied designs.
Wood type and grain influence the pattern’s appearance; softer woods burn more easily and show clearer fractals. Some artists mask areas with tape or insulating materials to direct the current and create deliberate shapes or boundaries.
Controlling the timing of current application also affects pattern complexity. Short bursts limit burn depth and expansion, while longer exposure allows fractals to grow extensive and more detailed.
Controlling Burn Depth and Shape
Adjusting voltage and the duration of burn directly changes how deep and wide the fractals appear. Higher voltage or extended current flow creates deeper, broader burns but increases risk. Maintaining a balance ensures intricate patterns without burning through the wood.
The conductive solution concentration alters burn behavior. More salt increases conductivity and can cause faster, more aggressive burns; a diluted solution gives finer, slower fractals.
Monitoring the process closely allows for real-time adjustments. Applying more solution during burning or repositioning electrodes can refine the design or stop unwanted spreading. Using a dimmer or adjustable power supply gives control over output.
Post-Processing and Cleaning
After burning, the wood surface often holds charred residue and soot, which must be removed to reveal the fractal design clearly. Brushing gently with a soft wire brush or sanding lightly exposes clean wood and enhances contrast.
Sealing the wood with clear varnish or epoxy preserves the design, prevents decay, and strengthens the piece. Some finishes can darken the wood further, intensifying the fractal pattern visually.
Cleaning also includes ensuring all electrical equipment is powered down and stored safely. Proper disposal or ventilation of smoke and burnt particles protects health during cleanup.
Finishing and Preserving the Artwork
The final steps focus on enhancing the wood’s texture, protecting the intricate fractal patterns, and preparing the piece for long-term display. Proper sanding, application of finishes, and thoughtful presentation ensure the artwork remains visually striking and durable.
Sanding and Smoothing
After the Lichtenberg fractals are burned into the wood, sanding is essential to remove rough edges and charred residue. Using medium-grit sandpaper (around 120-150 grit) first helps even out the surface without damaging the delicate patterns.
Once the surface is smooth, progress to a finer grit (220 or higher) for a polished finish. It’s important to sand gently to avoid erasing smaller fractal details. Sanding also prevents splinters and prepares the wood to better absorb protective finishes.
Using a tack cloth or compressed air after sanding removes all dust, ensuring the surface is clean before applying any sealants or coatings.
Applying Finishes and Sealants
Applying finishes protects the wood and deepens the visual contrast of the fractal designs. Options include polyurethane, tung oil, or epoxy resin. Polyurethane offers durable, clear protection and is available in matte, satin, or gloss finishes.
Tung oil penetrates the wood, enhancing natural color and adding water resistance, but may require multiple coats. Epoxy resin creates a thick, glossy layer that highlights the patterns and adds strong protection against moisture and wear.
When applying any finish, thin, even coats work best. Use a brush or cloth to apply, allow full drying time between coats, and sand lightly with fine grit paper if multiple layers are applied.
Displaying the Completed Piece
Choosing the right display method helps preserve and showcase the artwork. Framed or mounted pieces benefit from UV-resistant glass or acrylic to reduce light damage.
For standalone wood blocks, placing them on stands or shelves in controlled environments reduces exposure to humidity and temperature fluctuations that can cause warping.
Avoid direct sunlight and high moisture areas. Regularly dusting with a soft, dry cloth maintains the appearance without damaging the finish. Proper display enhances both the beauty and lifespan of the fractal wood art.